What the Heatit WiFi integration is
Heatit WiFi is a custom integration for Home Assistant that talks directly to the thermostat inside your own network — no cloud, no subscription and nothing passing through an external server. If your internet connection drops, control from Home Assistant keeps working.
It is developed and maintained by Smart Home Hellas, it is open source (MIT) and it installs from HACS. The current version is 2.1.1.
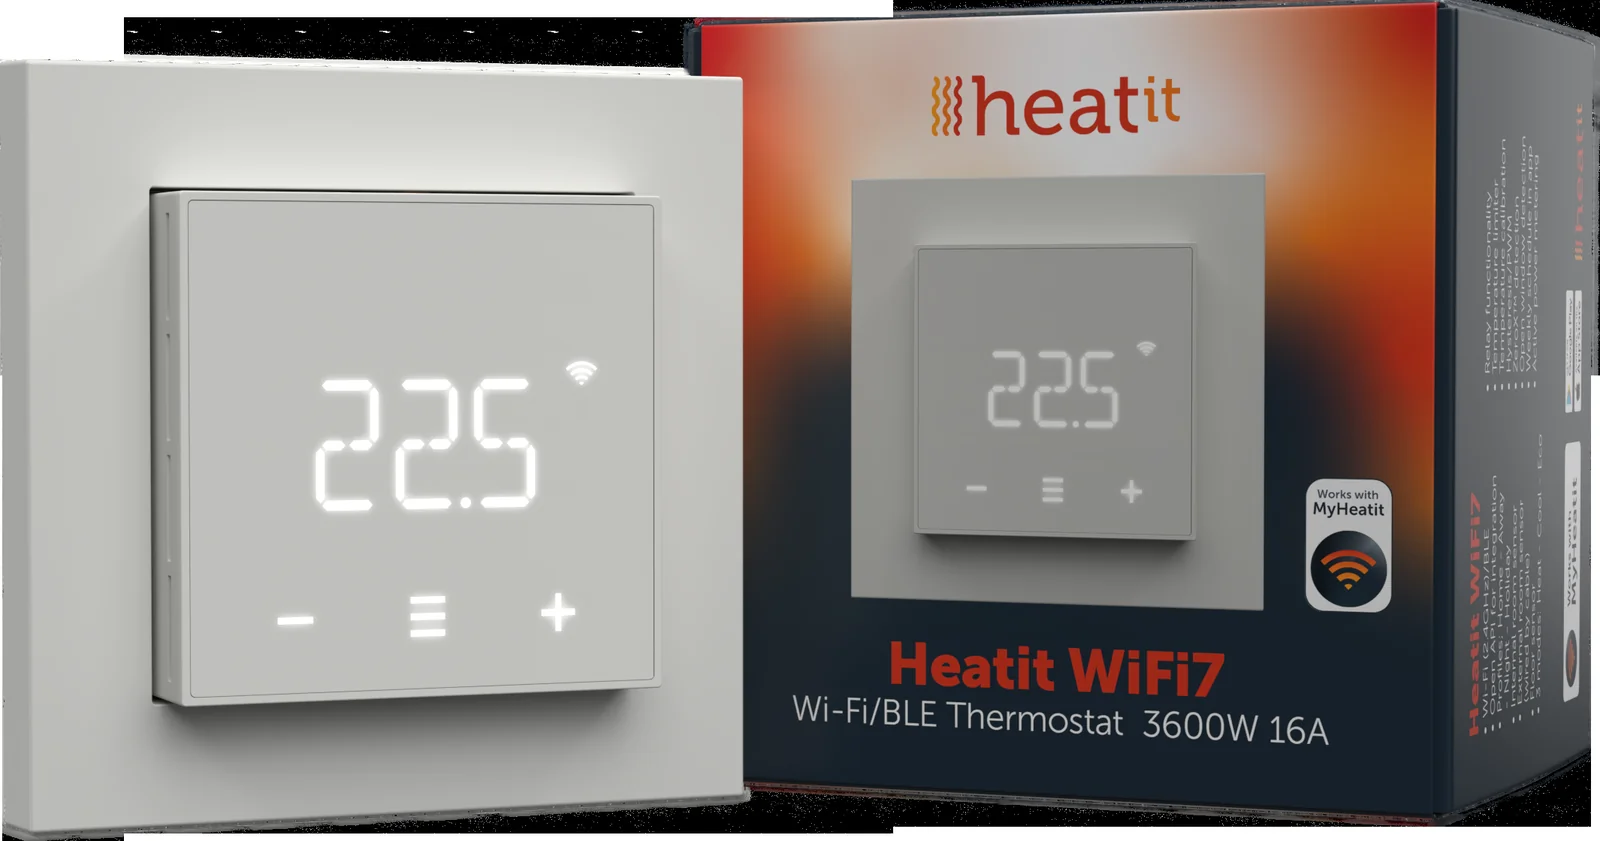
Independent integration: it is not affiliated with Heatit (Thermo-Floor AS) and it does not replace the official app — it complements it. The thermostat keeps working from MyHeatit as usual.
Supported devices
| Device | Firmware | Network discovery |
|---|---|---|
| Heatit WiFi7 | 0.1.13 and newer | automatic (mDNS) |
| Heatit WiFi6 V2 (DirectLink firmware) | 2.20 and newer | automatic (mDNS) |
| Heatit WiFi6 V1 | 2.20 and newer | manual, by IP |
Before anything else, the thermostat has to be joined to your home Wi-Fi through the official MyHeatit app. The integration does not perform the initial Wi-Fi setup; it connects to a thermostat that is already on the network.
First step: add the thermostat to the MyHeatit app
The initial setup always happens in the official MyHeatit app (Android / iOS): that is where you hand the thermostat your home Wi-Fi. The device accepts 2.4 GHz networks only — if your router broadcasts 2.4 and 5 GHz under the same name, split the two networks temporarily (or switch 5 GHz off for a few minutes) so the phone is definitely on 2.4 GHz while you hand over the credentials.
Steps

- Install MyHeatit (Heatit Controls AB) from the links above and create an account.
- Make sure the thermostat is in add mode:
- Automatic — for 60 minutes after it is powered up, as long as it has not already been added somewhere else. Nothing is shown on the display.
- Manual — hold the middle button for 5 seconds (the display shows
OFF) → press the down button once to reachCON→ press the middle button and move toAPP→ hold the middle button for about 2 seconds. Add mode lasts 90 seconds and is shown by rotating LED segments on the display.
- In the app, tap Add Device.
- Choose Wi-Fi (not Bluetooth — see below).
- Enter your Wi-Fi name and password.
- Pick the thermostat from the list, or scan the QR code printed on the product.
- Once it joins the network the display shows
INCL. If something goes wrong it showsErr.
Wi-Fi, not Bluetooth: a device added over Bluetooth never joins the network — it can only be controlled from within Bluetooth range, and Home Assistant cannot see it at all. The integration requires a thermostat added over Wi-Fi.
If adding fails, run a factory reset on the thermostat and try again. To remove it from the app, open the device and tap Delete this device — note that removing it resets the thermostat parameters.
Once the thermostat is on the network, the app has done its job as far as this guide is concerned. MyHeatit keeps working normally alongside Home Assistant.
Installation
Option 1 — HACS (recommended)
Steps- Make sure HACS is installed.
- Open HACS, click the ⋮ menu at the top right and choose Custom repositories.
- Repository:
https://github.com/thanoskas/heatit_wifi— Type: Integration — click Add. - Search for Heatit WiFi in HACS and click Download.
- Restart Home Assistant.
Option 2 — Manually
- Download the latest release from the Releases page.
- Copy the
custom_components/heatit_wififolder into your Home Assistantconfig/custom_components/folder. Final path:config/custom_components/heatit_wifi/manifest.json. - Restart Home Assistant.
Adding the thermostat
Automatic discovery (WiFi7, WiFi6 V2)
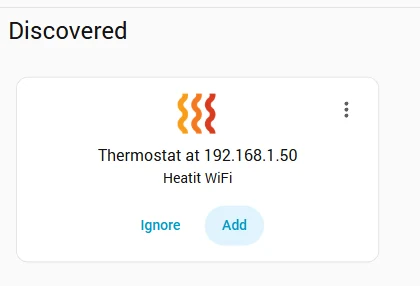
Shortly after the restart a Discovered card appears under Settings → Devices & services. Click Add, give the thermostat a name (e.g. "Living room") and submit.
Manually (WiFi6 V1, or if the card does not appear)
- Settings → Devices & services → Add integration.
- Search for Heatit WiFi.
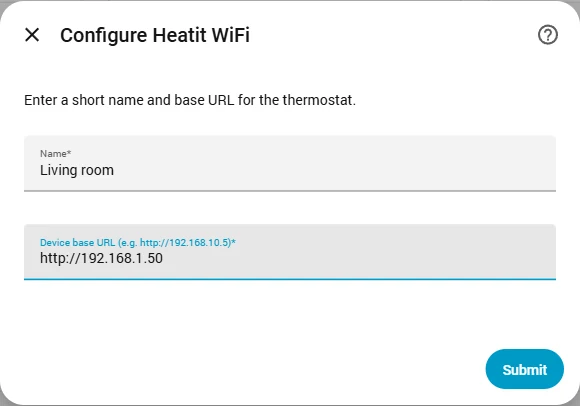
- Enter a name and the local IP of the thermostat (e.g.
192.168.1.50— thehttp://prefix is optional). - Submit. The integration first checks that the device answers and only then creates the entry.
Tip — lock the IP on your router: give the thermostat a fixed IP through a DHCP reservation (static lease), so it always gets the same address:
- Find the thermostat's MAC address: on its device page in Home Assistant, on the thermostat display, or in the router's list of connected devices.
- In the router menu (usually LAN → DHCP Server → Address Reservation or Static Lease) bind that MAC to an IP outside the range the router hands out automatically — e.g. keep
.20–.60for your fixed devices. - Reboot the thermostat (or wait for the DHCP lease to renew) and check that it picked up the new address.
Do the same for every device that talks locally to Home Assistant — thermostats, relays, the server itself. The integration follows address changes over mDNS, but a locked IP keeps everything steady after a power cut or a router reboot.
Options
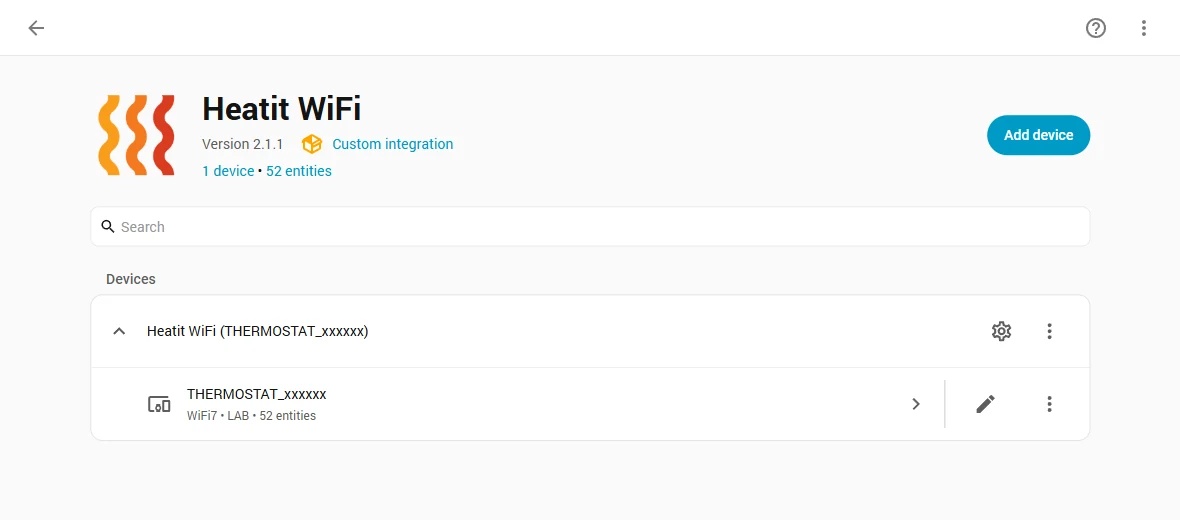
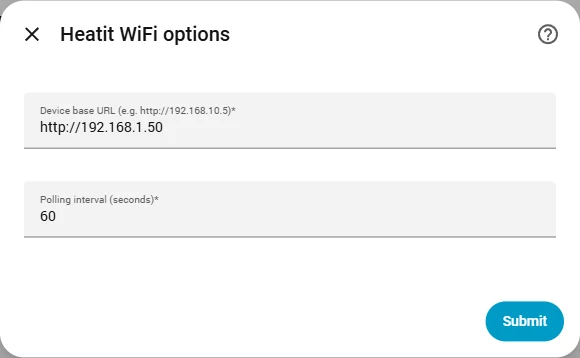
Open the integration entry and click Configure:
- Update interval — from 10 to 3600 seconds (default 60).
- Host — change the IP without removing the device. The same is available from the ⋮ → Reconfigure menu. On the WiFi7 and the WiFi6 V2 a new IP is picked up automatically over mDNS.
What you get in Home Assistant
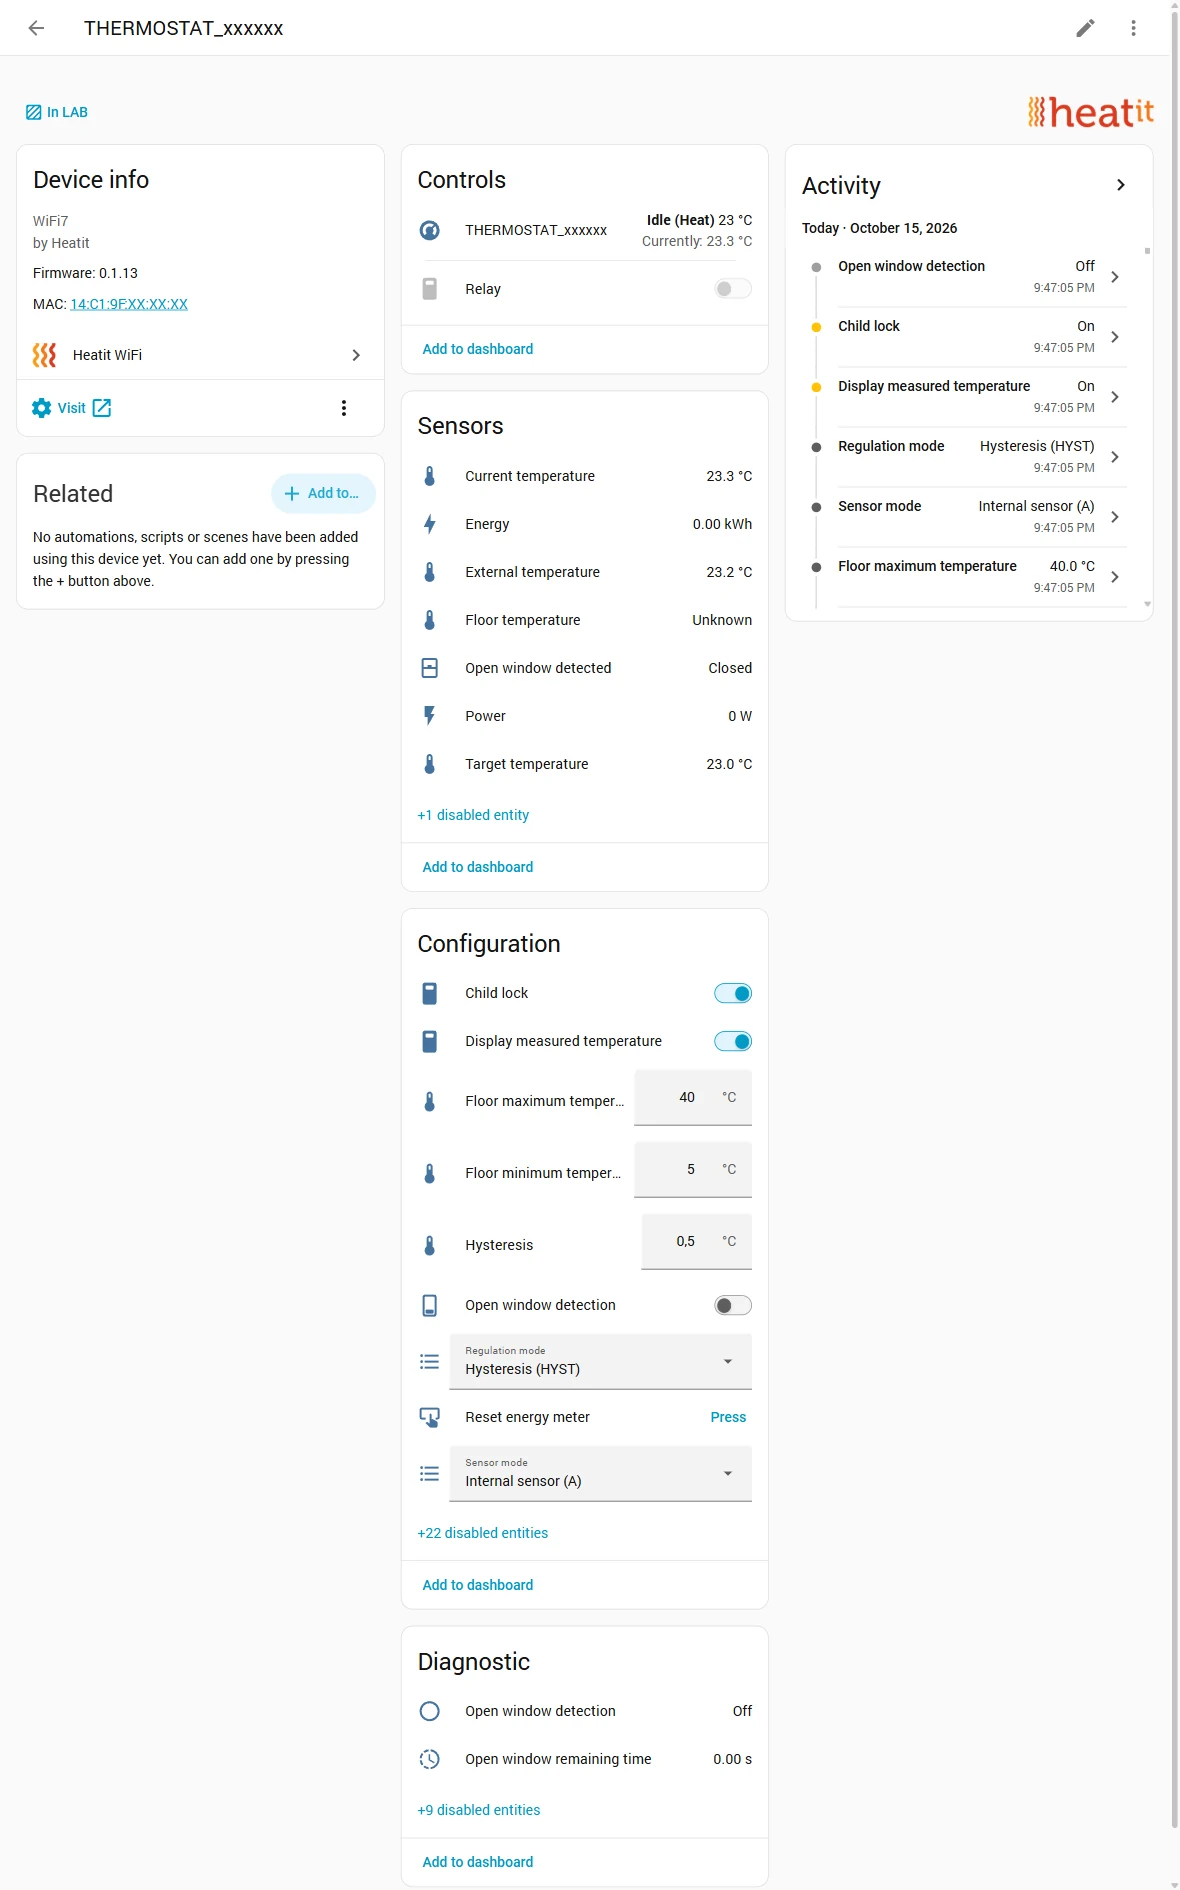
Each thermostat becomes one device with the entities below. The ones disabled by default can be enabled one by one from the device page.
- Climate: Heat / Cool / Off modes, target temperature and an Eco preset. The current temperature follows whichever sensor is selected on the device (floor, internal or external).
- Sensors: current and target temperature, power (W) and energy (kWh). Disabled by default: internal / external / floor temperatures, heating / cooling / eco setpoints, Wi-Fi signal strength and quality, IP address, open-window time remaining.
- Binary sensors: open window detected, open-window detection active.
- Switches: show measured temperature on the standby screen, child lock, open-window detection. In Relay mode (WiFi7): relay output, always on, inverted output.
- Buttons: reset the energy meter, settings reset (keeps Wi-Fi) and factory reset.
- Numbers: floor temperature limits (enabled by default — floor protection), internal / external sensor limits, hysteresis, display brightness, sensor calibration, on-time in power regulator mode (PWER), load size, retry delay after an error, relay timers (WiFi7).
- Selects: sensor mode (Floor / Internal / AF / External / A2F / Power regulator / Relay on the WiFi7), regulation mode (Hysteresis / PWM), NTC sensor type (6.8–100 kΩ), backup sensor and relay state after a power cut (WiFi7).
A disconnected floor or external sensor — where the firmware reports exactly 100 °C — is shown as unavailable instead of 100 °C, so it does not spoil your graphs and automations.
From the device page, Visit device opens the thermostat's own web UI, while Diagnostics downloads an anonymised copy of /api/status for bug reports.
Careful with the factory reset: that button is disabled by default because it also erases the Wi-Fi credentials. After it, the thermostat has to be set up again from the Heatit app. For a plain settings reset use the other button, which keeps the Wi-Fi.
Device settings that matter in Home Assistant
The thermostat has its own on-screen menu: hold the middle button for 5 seconds, step through it with «+» / «−» and leave with ESC. Almost all of these settings also exist as Home Assistant entities, so you can change them from whichever side suits you. The table maps one to the other — and explains why some of them decide what you see in Home Assistant.
| On the display | In Home Assistant | What it does |
|---|---|---|
OPER | Sensor mode select | Which sensor regulates the heating: A internal room, F floor, AF internal + floor, A2 / A2F external wired, PWER power regulator with no sensor, EXT wireless sensor over DirectLink. |
MIN / MAX | Temperature limit numbers | Lower and upper limit per sensor (ALO/FLO/A2LO and AHI/FHI/A2HI). In AF or A2F the floor limit is set to 27 °C automatically; in every other sensor mode the limits are 5–40 °C. |
REG | Regulation mode select + hysteresis number | HYST (hysteresis) or PWM. Hysteresis is adjustable from 0.3 to 3.0 °C — a small value means steadier temperature and more relay cycles. |
CAL | Sensor calibration numbers | Corrects the reading by up to ±6 °C, separately for room (CAR), floor (CAF) and external (CAE). The corrected value is what the display, the app and Home Assistant all show. |
SEN | NTC sensor type select | 6.8 / 10 / 12 / 15 / 22 / 33 / 47 / 100 kΩ. Both sensors must use the same value — the wrong one gives a wrong floor temperature. |
LOCK | Child lock switch | Locks the buttons on the device only. On the device: hold the left and right buttons for 10 seconds (LOCK / OPEN). |
OWD | Open window switch + binary sensors | When the sensor sees a rapid temperature drop, the setpoint falls to 5 °C so no energy is wasted. |
BRIT | Display brightness numbers | Separate brightness for the active display (BR1) and standby (BR2). With BR2 at 0 the display turns off completely in standby. |
LOAD | Size of load number | At 0 the device's own power measurement is used. If the heating element is driven through a contactor, declare the load here in 100 W steps (up to 9900 W) so that the W and kWh figures come out right. |
KWH | Energy sensor + reset button | Total consumption. On the device: press the middle button once to read it, hold it for 2 seconds to reset it. |
CON → DIR | — | DirectLink: a direct pairing with other Heatit thermostats or relays, with no hub in between. THER sends mode and setpoint, REL drives external relays from its own relay state, RECV starts receiving from another device (hold the button for 2 seconds). |
FACT | Factory reset button | Full reset. On the device: FACT → middle button until -- -- blinks → hold for 5 seconds, or hold the right and middle buttons for 60 seconds. |
Main and secondary thermostat. The secondary one takes mode and setpoint from the main one but regulates with its own sensor — so one thermostat can hand a schedule to the others without any room losing local control. In sensor mode EXT the thermostat uses the temperature it receives over DirectLink from another device, falling back to its internal sensor if that communication is lost. Pairings are made on the device, in the app or through the API — the Home Assistant integration does not manage them. With Home Assistant the same result comes out cleaner as a thermostat group or a single automation, where every zone stays its own entity; DirectLink earns its keep where there is no Home Assistant, or as a fallback if it goes down.
Changes made on the display are not instant: Home Assistant polls the thermostat every 60 seconds (10–3600 under Options). If you change something on the device, wait one polling cycle or call the homeassistant.update_entity action.
Consumption in the Energy dashboard
The thermostat measures power and energy itself, so no separate meter is needed. To get it into the energy dashboard: Settings → Dashboards → Energy → Individual devices and add the thermostat's kWh sensor. That gives you the running cost of each room's heating separately.
What to do when…
- The setpoint dropped to 5 °C on its own. Open window detection kicked in, because the temperature fell quickly. It clears itself after 1 hour or once the temperature rises by 3 °C, and manually as soon as you change the setpoint. In Home Assistant you can see it on the open-window binary sensors — if you do not want it at all, turn the matching switch off.
- The display reads
LOCKand the buttons do nothing. That is the child lock: hold the left and right buttons for 10 seconds (you will seeOPEN), or use the switch in Home Assistant. Control from Home Assistant and from the app is never locked. - The temperature in Home Assistant is not the one you expected. The climate entity's current temperature follows the sensor mode: in
Fit shows the floor, inAthe room, inAFthe room with the floor as a limit. The separate internal, floor and external sensors exist as entities — they are just disabled by default. - Home Assistant will not accept the setpoint you enter. It is outside the
MIN/MAXlimits. With a floor sensor the limit is 27 °C by default — raise it only if the floor manufacturer allows it. - Two thermostats side by side read higher than the real temperature. They are heating each other inside the box. They belong in separate junction boxes, as far apart as practical; calibration (
CAL) is a stopgap. - The display reads
RES. A factory reset is running and takes about 5 seconds. It also wipes the Wi-Fi credentials: the thermostat goes unavailable in Home Assistant and has to be set up again from MyHeatit.
If an error code appears on the display, first try removing and refitting the front cover to restart the device:
| Display | What it means |
|---|---|
INCL | Adding the device in the app succeeded. |
Err | Adding failed — run the add procedure again. |
Err1 / Err3 | Internal error. Contact support. |
Err2 | Radio error. Contact support. |
Err4 | Floor sensor: sensor mode F, AF or A2F is selected with no floor sensor connected, or the sensor is faulty. |
Err5 | External sensor: mode A2 or A2F with no external sensor connected, or a faulty sensor. |
Err6 | Overheating — the device switches the relay off by itself. Call your electrician. |
Err7 | Overload — the device switches the relay off by itself. Call your electrician. |
For a sensor-not-connected error the device has to be powered down while the wiring and the sensor are checked; once the fault is cleared and power is restored, it works normally again. For communication problems with Home Assistant see troubleshooting.
Migrating from the old heatit_wifi6 integration
Since version 2.0.0 the integration is called Heatit WiFi (domain heatit_wifi). Home Assistant sees it as a new integration, so:
- Note the names of your thermostats in the old integration.
- Delete the old entries: Settings → Devices & services → Heatit WiFi6 → ⋮ → Delete.
- Remove the old
config/custom_components/heatit_wifi6folder — in HACS, remove the old repository — and install the new one as described above. - Restart and add the thermostats again with the same names. Entity IDs are derived from the name, so automations and dashboards usually keep working. Re-enable any optional entities you were using.
Troubleshooting
- Not discovered automatically: the WiFi6 V1 does not advertise over mDNS — add it manually by IP. Automatic discovery needs Home Assistant and the thermostat on the same network, with no VLAN or client isolation in between.
- "Failed to connect": open
http://<thermostat-ip>/api/statusin a browser on the same network. If you get JSON, Home Assistant can reach it too. If not, check the IP in the Heatit app or on your router. - Stopped updating after a router change: the thermostat got a new IP. Use ⋮ → Reconfigure on the entry — on the WiFi7 and the WiFi6 V2 this also happens automatically.
- Floor temperature shows unavailable: the sensor is disconnected, or the wrong NTC type is selected.
For bug reports please use the issue tracker on GitHub and attach the diagnostics file from the device page.
Support
The integration is free and open source. If you want help with the setup, with a dashboard or with heating automations, get in touch — or email info@smarthomehellas.gr.